How to Set Up Your Hosting Account
Get your website up and running with our simple step-by-step guide. Follow these instructions to add your hosting package, connect your domain, and install WordPress.
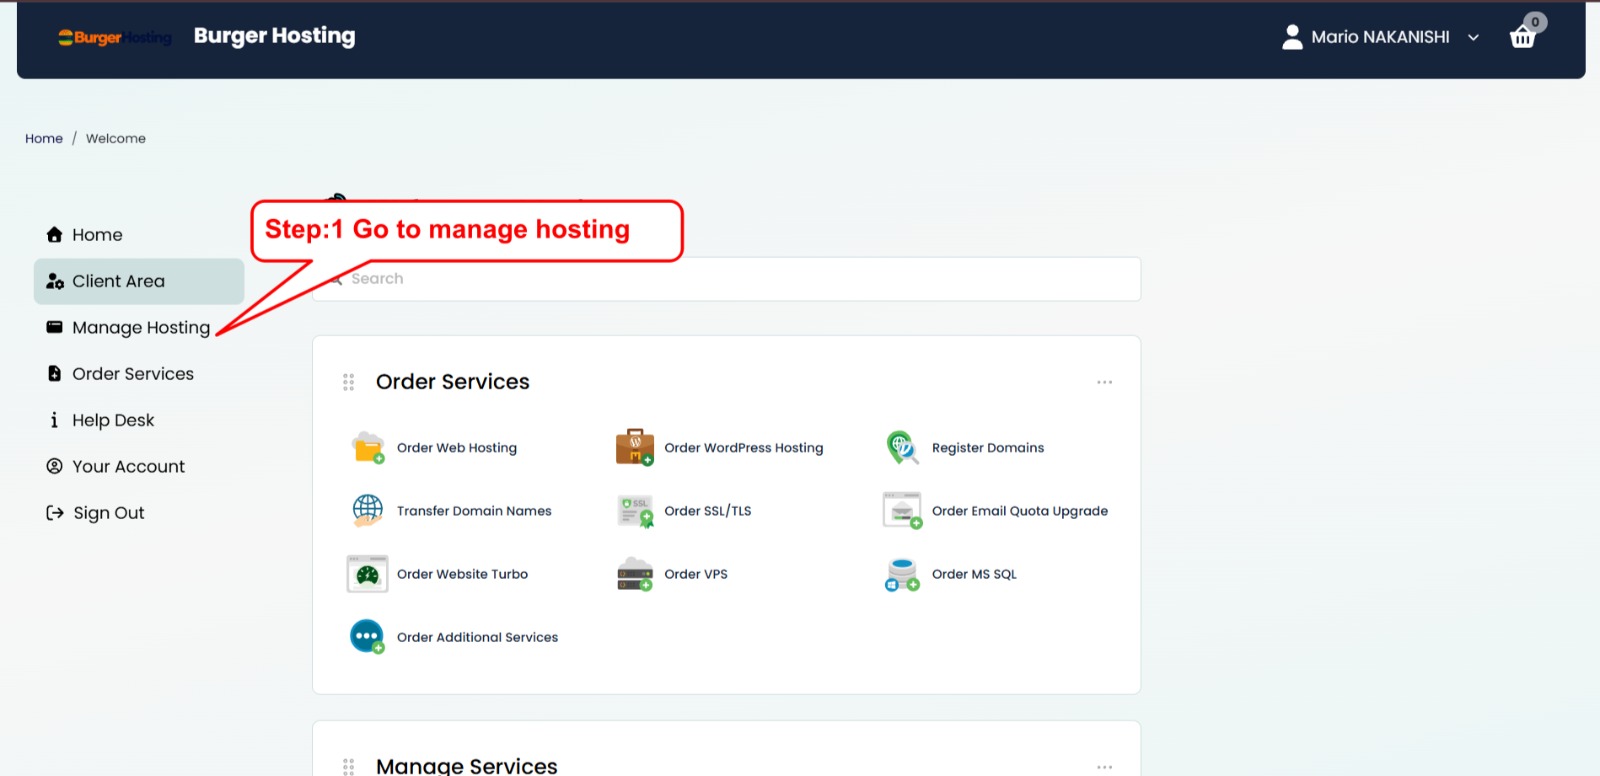
Go to Manage Hosting
First, log in to your Burger Hosting client account. From the dashboard, locate the left-hand navigation menu and click on Manage Hosting.
This section allows you to manage your hosting packages and add a new hosting service.
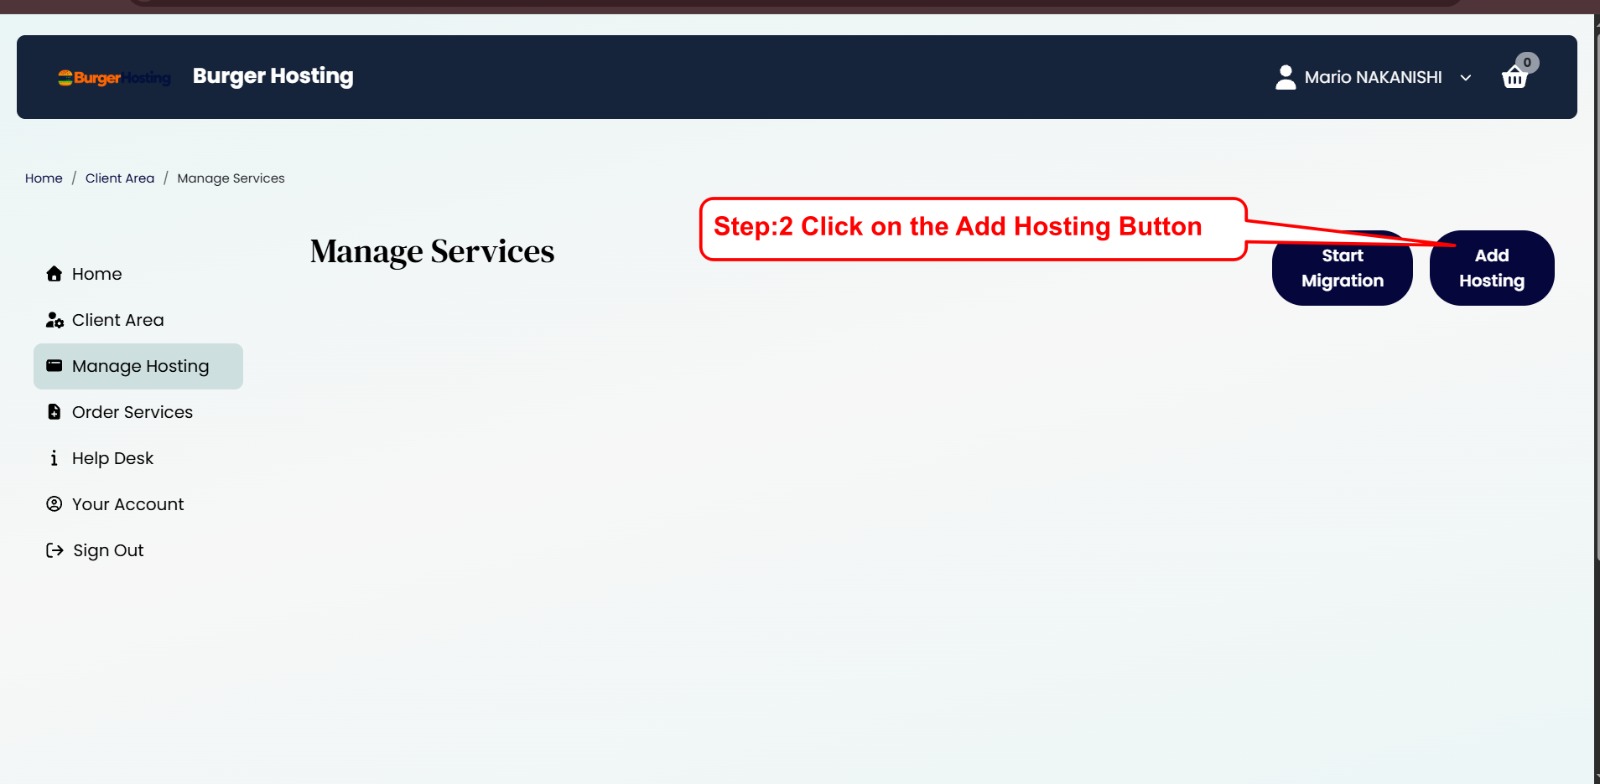
Click on Add Hosting
Once you reach the Manage Services page, you will see the available hosting management options.
Click the Add Hosting button to begin adding a new hosting package to your account.
Enter Your Domain and Select a Package
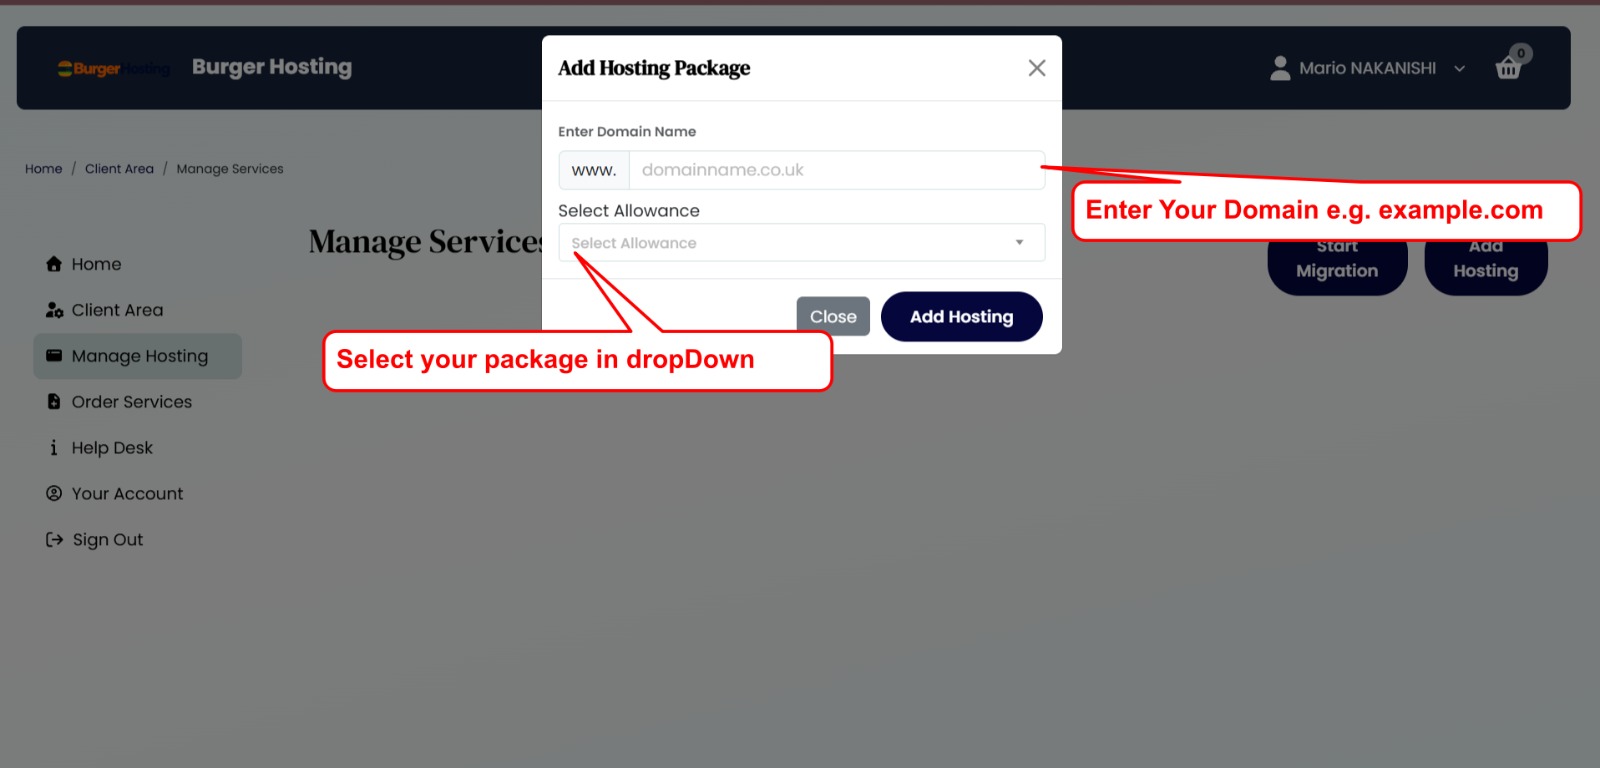
A popup window will appear asking you to enter your domain name and select your hosting allowance.
- Enter your domain name (e.g. example.com).
- Select your preferred hosting package from the dropdown.
- Review your selections before proceeding.
Manage Your Hosting Package
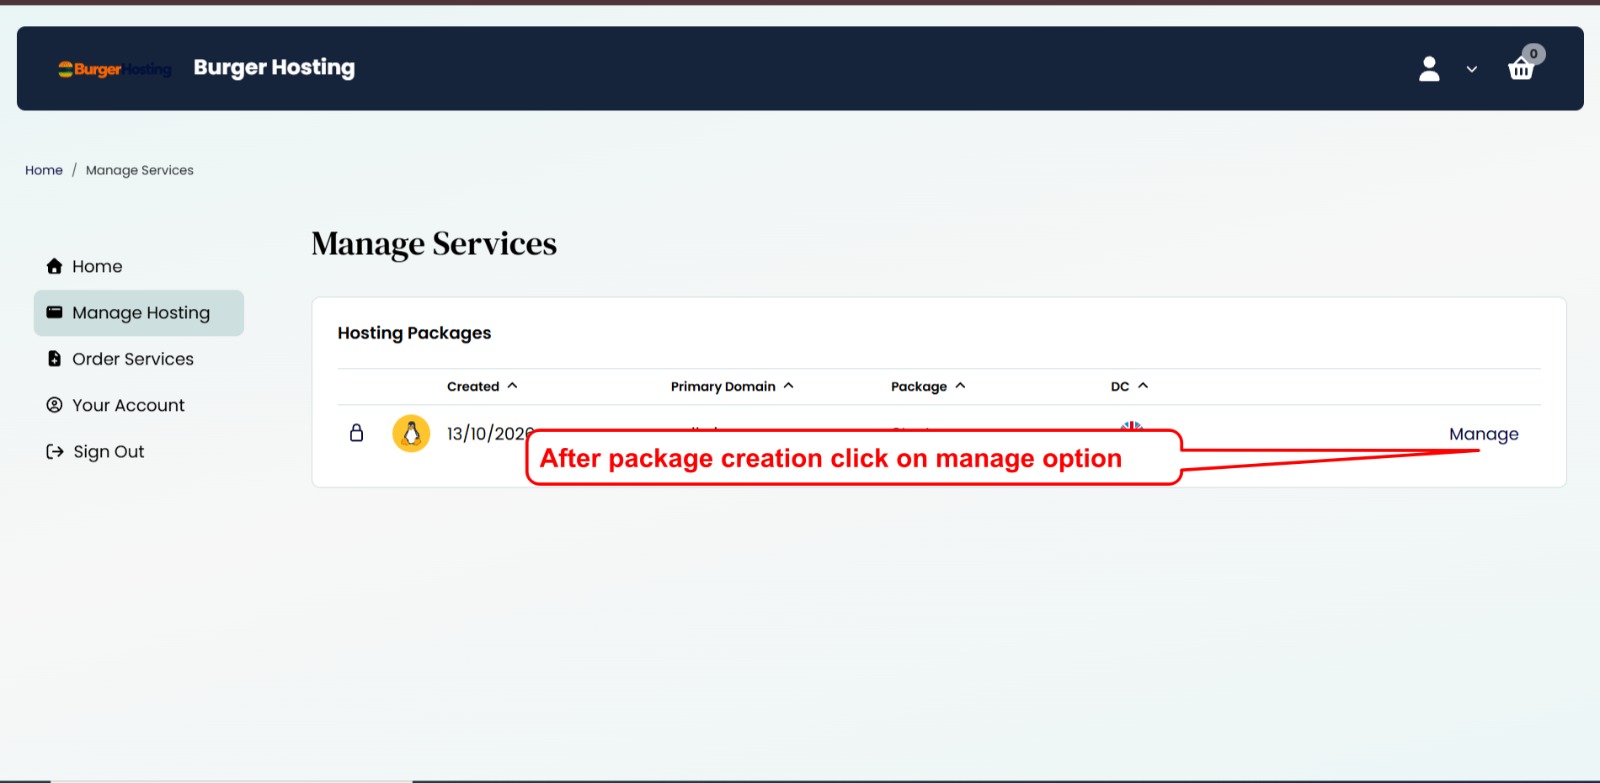
After successfully adding your hosting package, it will appear in the Hosting Packages section.
Find your newly created hosting package and click the Manage option to open its hosting control panel.
Update Your Domain Nameservers
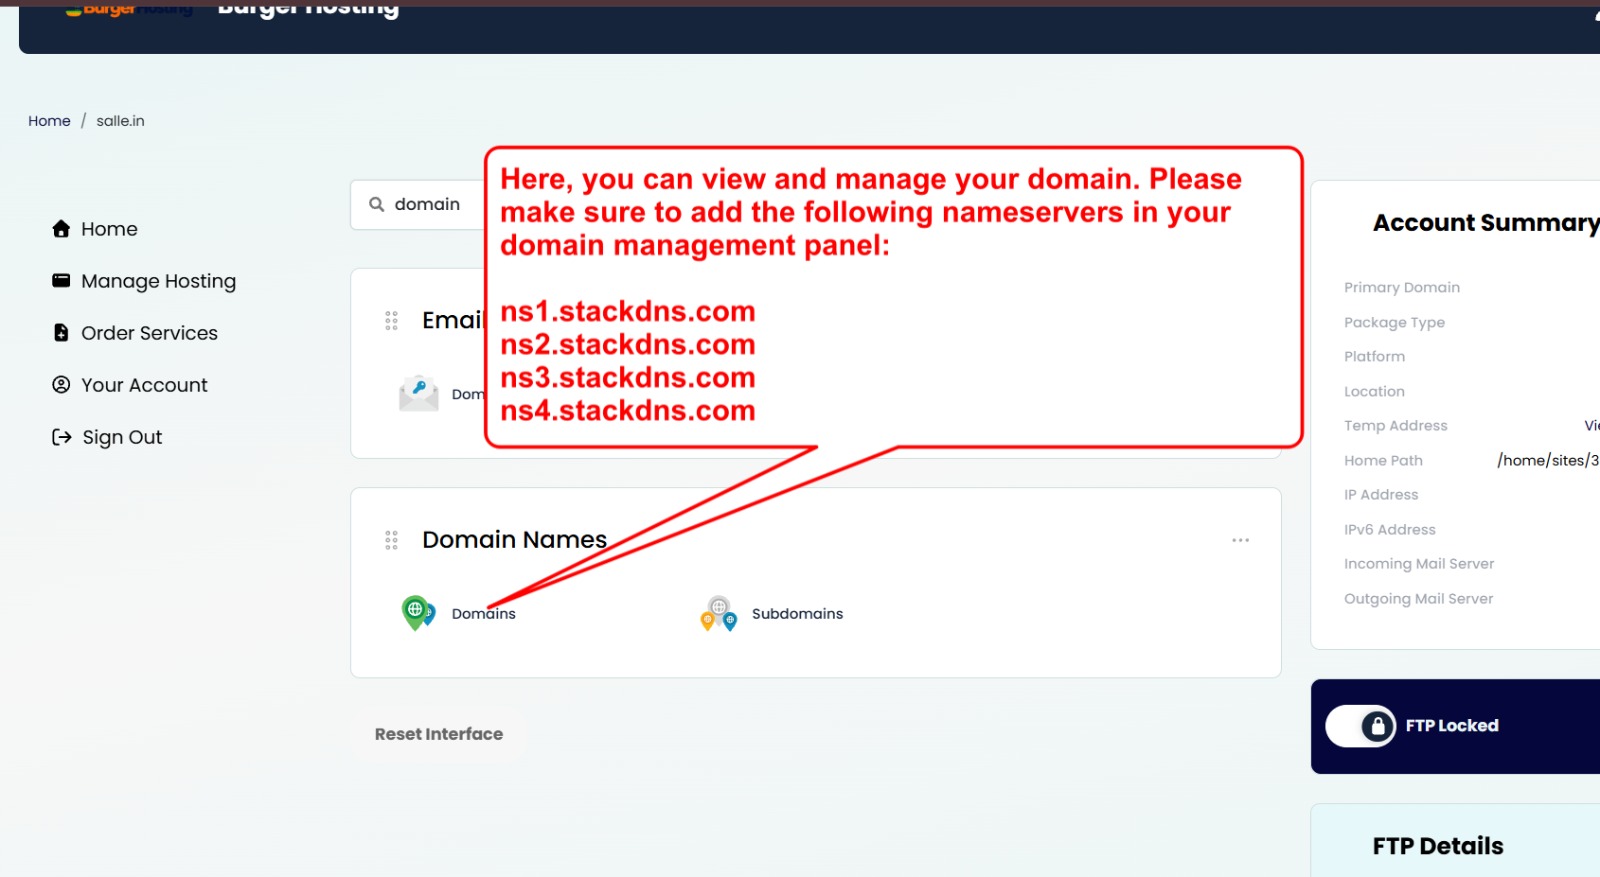
After opening your hosting control panel, locate the Domain Names section.
To connect your domain with Burger Hosting, log in to the domain registrar where you purchased your domain and update its nameservers.
- ns1.stackdns.com
- ns2.stackdns.com
- ns3.stackdns.com
- ns4.stackdns.com
Find WordPress in One-Click Installs
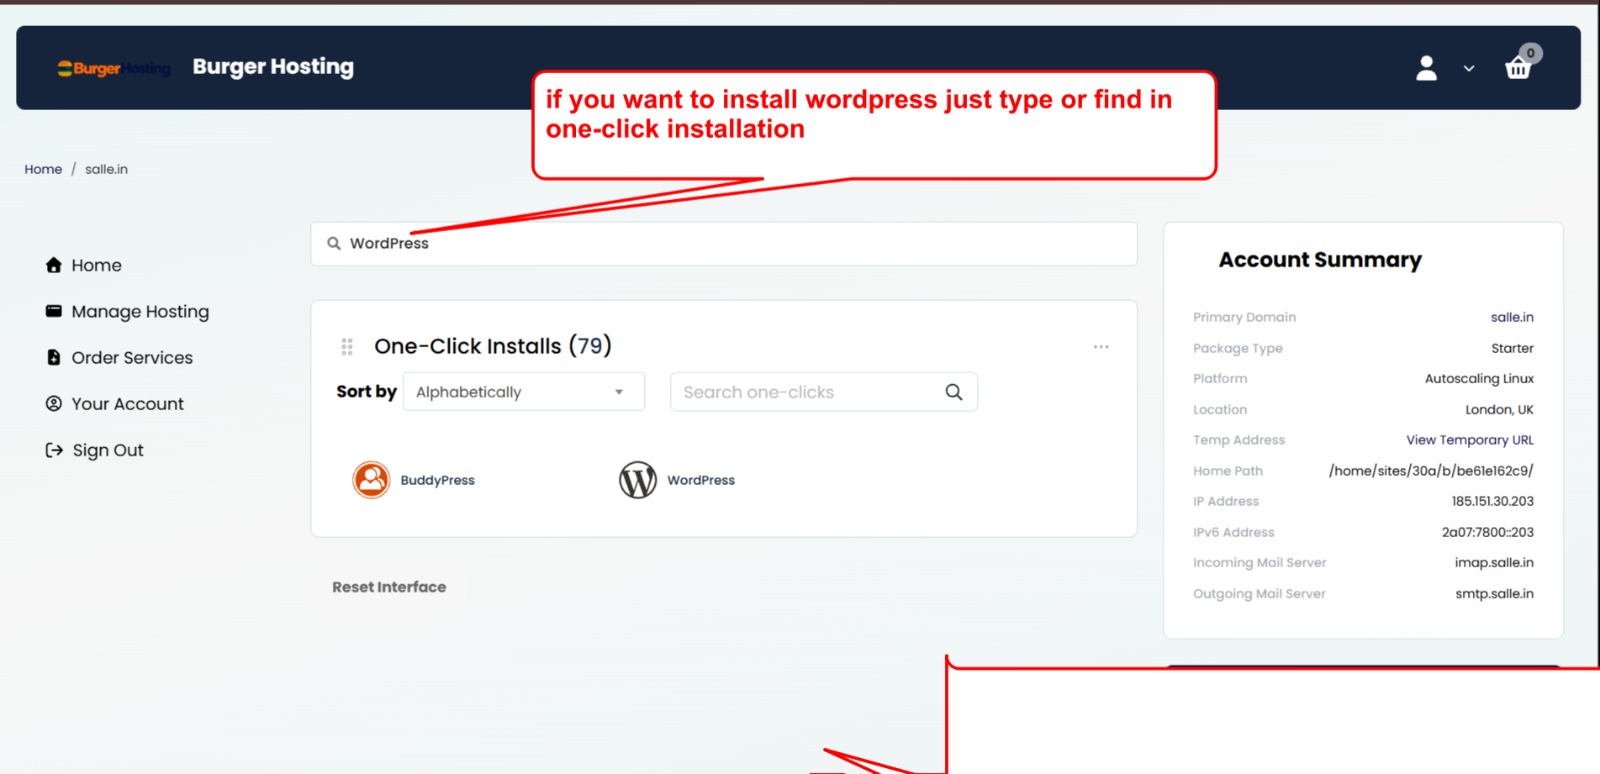
Once your hosting control panel is ready, use the search bar to find WordPress.
You will find WordPress under the One-Click Installs section. Select the WordPress option to open the installation page.
Install WordPress on Your Domain
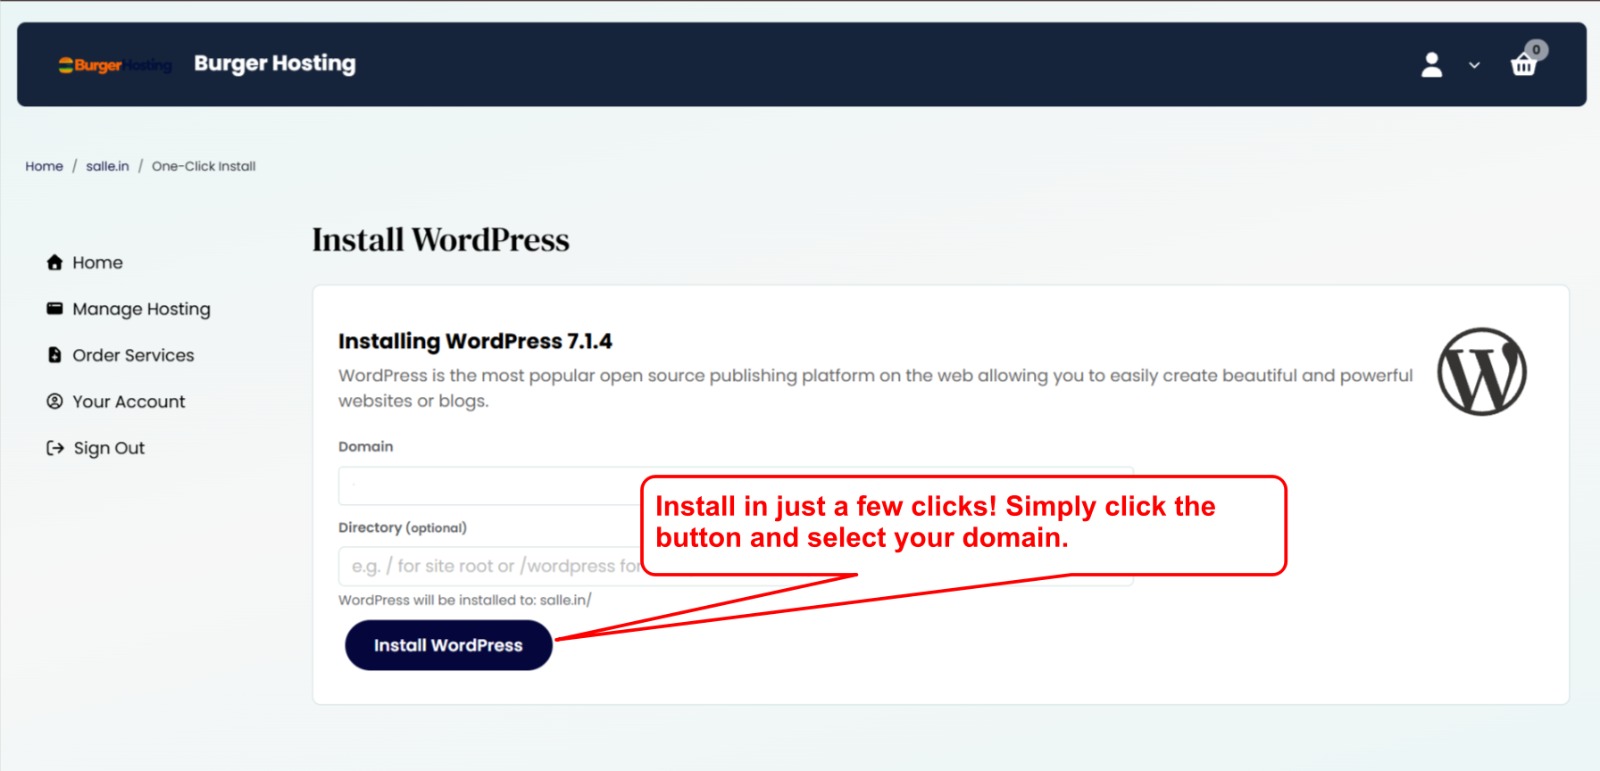
You are now ready to install WordPress on your domain. On the installation page, follow these steps:
- Select your domain from the Domain dropdown.
- Leave the Directory field empty to install WordPress on the main domain.
- Check your selected installation details.
- Click the Install WordPress button.